KEW 2: Running Kubernetes locally
“I hear and I forget. I see and I remember. I do and I understand.” ― Confucius
Previously I planned to spend this week learning how to run Kubernetes locally as well as in the cloud. Due to being short on time, I decided to focus on running it locally this week using chapter 3 of Kubernetes in Action.
Running Kubernetes locally requires a tool. Many options exist, such as Minikube and Docker Desktop. I decided to use Kubernetes in Docker (Kind) because I’d used it before. Kind was primarily created to test Kubernetes, but has become a popular option for running clusters locally. I like how Kind gives the option to run multi-node clusters using a separate container for each worker node. I also prefer a tool that allows me to use the command line.
I’ll use the example
in Chapter 3 of the book to create my cluster. It includes a basic configuration YAML file to create a simple multi-node cluster. To get the cluster up and running, I first need to run the kind create cluster command and pass the configuration file that contains the instructions for the various nodes used by the control and workload planes.
kind create cluster --config kind-multi-node.yaml
After executing the command, the Kubernetes cluster is running successfully with one control-plane node (previously referred to as the master node in legacy documentation) in the control plane and two worker nodes in the workload plane. Both the control-plane node and worker nodes are running as separate isolated containers.
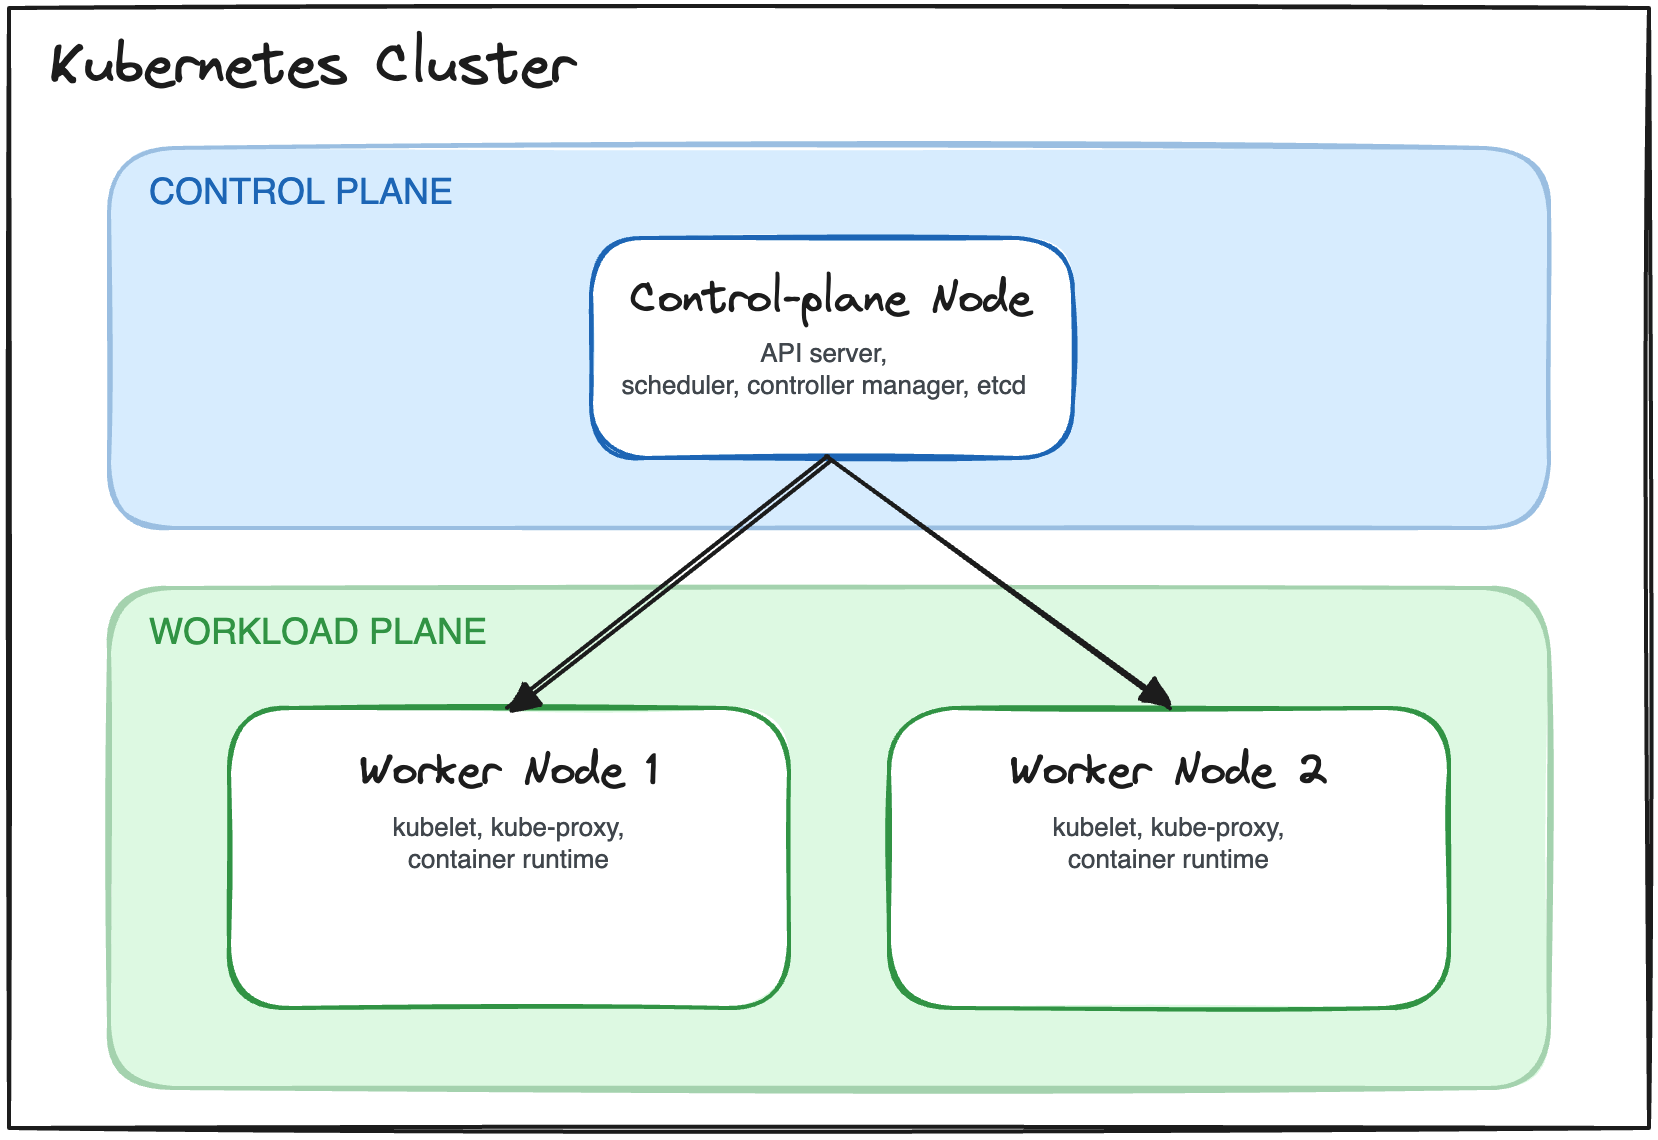
But how do I know that the nodes are running as separate containers? Well, I can check using docker ps.

Here we can see the three nodes: kind-control-plane, kind-worker and kind-worker2.
So, we have our control-plane node and worker nodes running as Docker containers on our host machine. If you look back at the Kubernetes cluster diagram, you may have noticed that I’ve added some additional components in each of the nodes. What are they? If we jump into one of our nodes, we can find out! Let’s start with the control-plane node.
I can jump into the control-plane node using the docker exec command and pass the node and shell as arguments. In this instance we want the control-plane node and bash as our interactive shell, so the command will be:
docker exec -it kind-control-plane bash
Once inside the control-plane node Docker container, I can check to see if there are any containers running:
crictl ps
crictl CLI tool instead of Docker to check for containers on any of the cluster's nodes.This lists our pods running as containerd containers:

crictl ps.I’ve highlighted the main components I’ve learnt about so far:
- API server: The entry point to the Kubernetes cluster
- scheduler: Determines which worker node a newly created pod runs on
- controller manager: Runs the reconciliation loop that continuously checks if the cluster state meets the desired state
- etcd: The key-value datastore for the cluster
Let’s take a look at one of the worker nodes next!

kindnet-cni and kube-proxy as containerd containers.I’ll ignore kindnet-cni for now. I haven’t learnt about it yet. My guess is that it is used to allow pods to communicate across nodes (more on that in a future post). What makes me think it is related to networking? If I tail the logs for the kindnet-cni container using crictl logs -f 99b, I can see a bunch of interesting logs that suggest networking is involved:

kindnet-cni logs hinting at its networking responsibilities.Next, I can see a kube-proxy pod running. This pod maintains network rules on the worker node and is responsible for routing traffic to the correct pod.
Kubelet is the node agent responsible for communicating with the API server on the control-plane node. It watches for objects assigned to nodes, such as pod deployments, and goes on to create the pods. So why can’t I see kubelet running? Well, it’s not a pod. I can confirm this by running crictl pods, which will list out the pods specifically. If I want to check if kubelet is installed, I can run systemctl status kubelet within the worker node.

kubelet is installed and running on the worker node via systemctl.Okay, so I have my worker node set up, but there appears to be one thing missing. There aren’t any pods running an application! That will be a fun thing to explore in the next post when I try to get the cluster running in the cloud.
Before I finish, I best remember to clean up. I can delete the cluster using the following command:
kind delete cluster
kind. This means the cluster name doesn't need to be passed as an argument when deleting the cluster. For a non-default name, you'd need to run kind delete cluster --name <cluster-name>.That was a lot of fun. I’d highly recommend Kubernetes in Action to anyone wishing to learn more about Kubernetes. Marko Lukša and Kevin Conner have done a brilliant job. I look forward to finding out what more I can learn from them in the coming chapters!